How to Build a LINE ChatGPT Chatbot with Zero Coding Effort
In this blog, I’ll share my experience of creating a LINE chatbot powered by OpenAI’s ChatGPT. The goal is to attach a LINE official account with an auto-reply chatbot function that responds based on the user’s current message and conversation history. The best part? No coding is required!
Example: Chatbot Conversation
Here is an example of a conversation between a user and a chatbot, showcasing the chatbot's context-aware responses:

To achieve this, you will need the following tools:
- OpenAI API
- LINE Official Account
- MAKE Account: To automate the workflow between LINE and OpenAI.
🚀 Build the Chatbot Workflow in MAKE
Now we get into something serious! Here’s the overall workflow:
The chatbot receives a user’s message, retrieves conversation history from the data store, aggregates the data, sends it to OpenAI, and replies to the user.
We’ll create this workflow using a MAKE scenario — a series of modules that define how data flows and transforms between services. Learn more about scenarios here.
🧩 Scenario Overview
This is the complete scenario we’ll walk through step by step:

🔍 Behind the Scenes: MAKE Modules
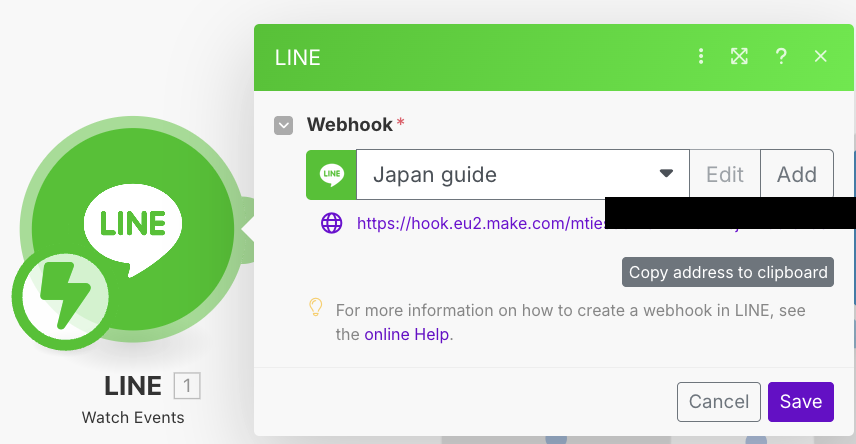
1. LINE → Watch Events
- Add your webhook to listen for user messages. We already completed it during preparation, in step 3.
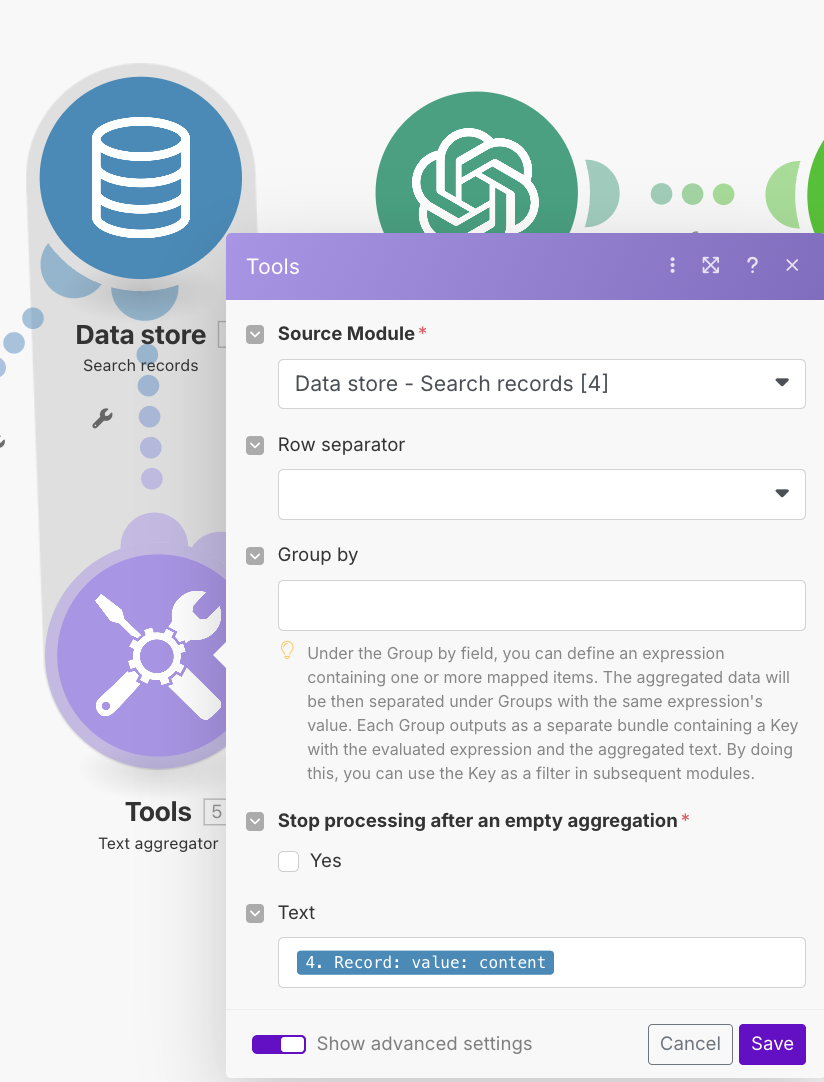
2. Data Store Retrieve & Text Aggregation
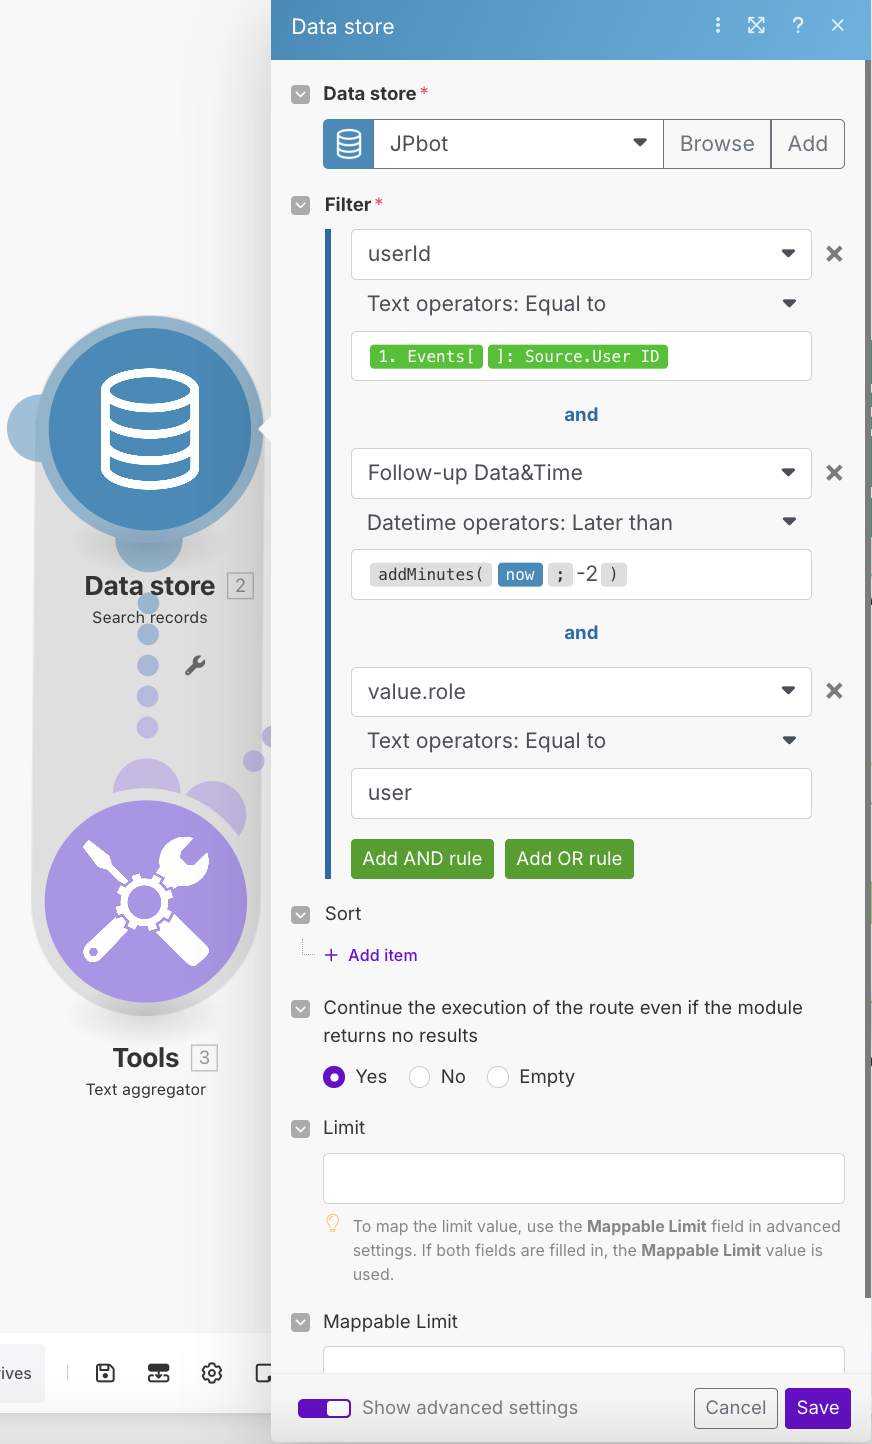
- First Data Store: Retrieves the user’s message history within the last
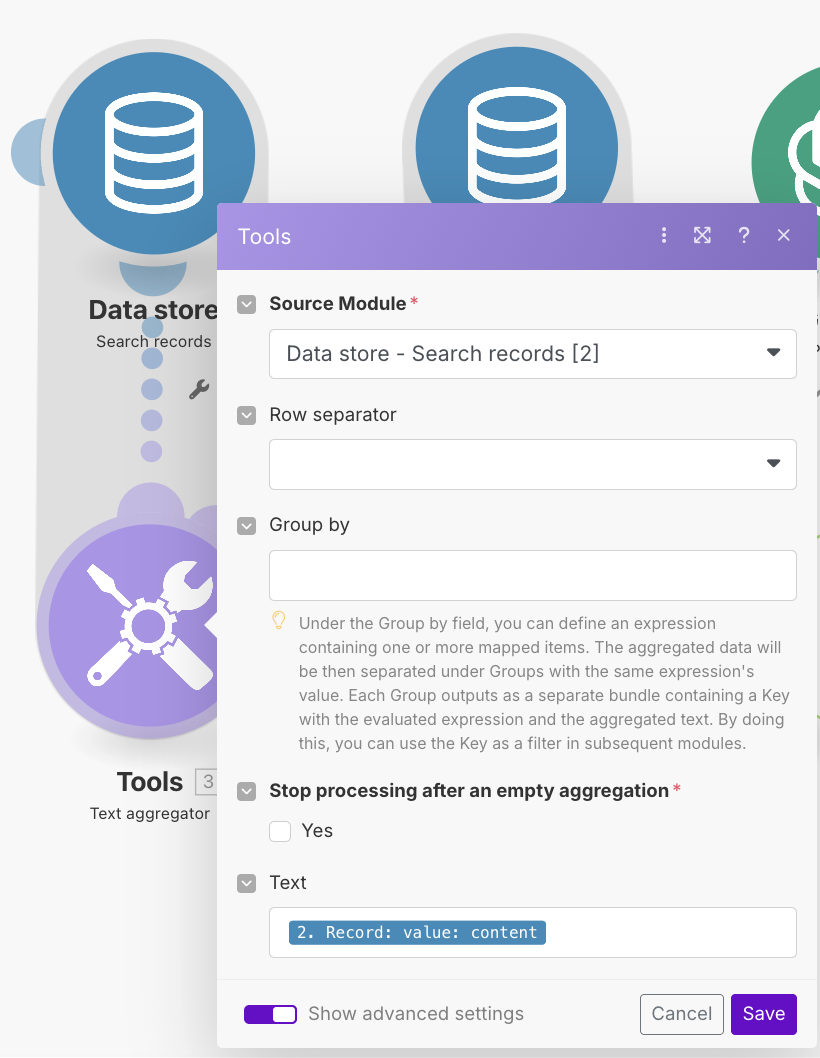
{n}minutes (you can adjust the{-2}value). - First Tools: Aggregates the historical user queries.
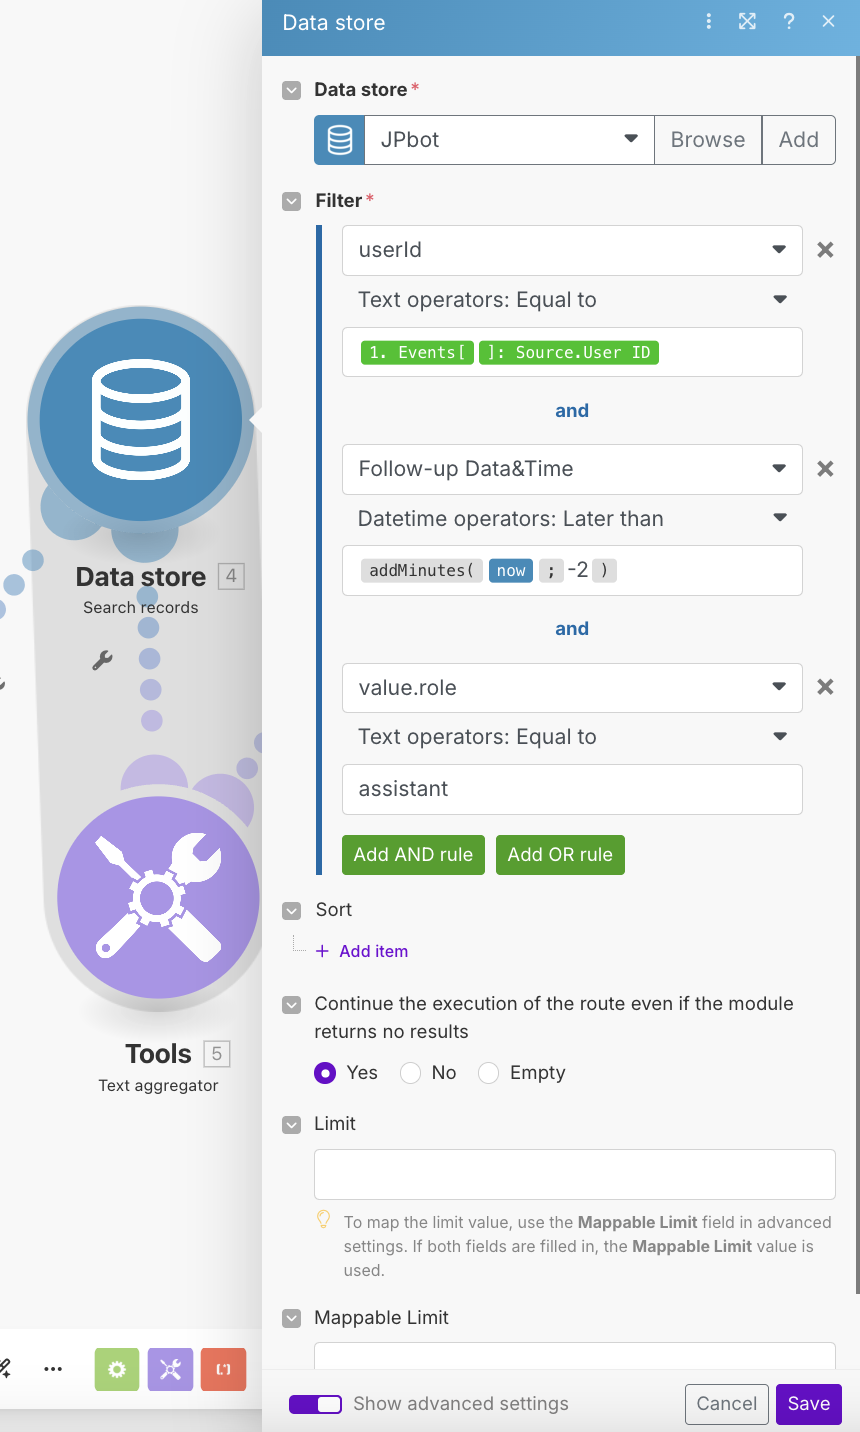
- Second Data Store: Retrieves the chatbot’s (assistant’s) reply history within the last
{n}minutes (you can adjust the{-2}value). - Second Tools: Aggregates the historical chatbot’s (assistant’s) replies.
3. OpenAI Module + Error Handling
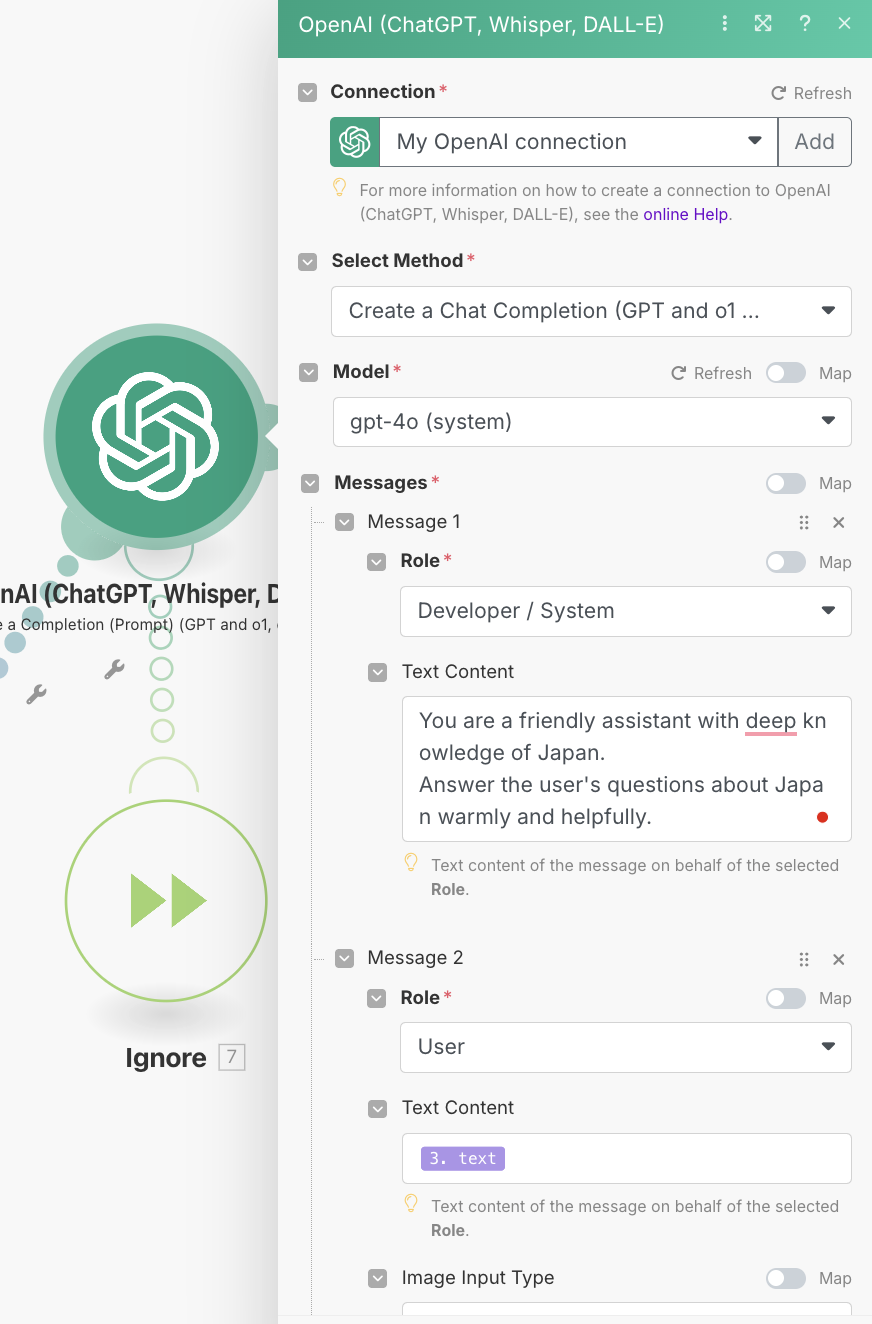
- Choose your model (e.g.,
gpt-3.5,gpt-4). - Setup message flow:
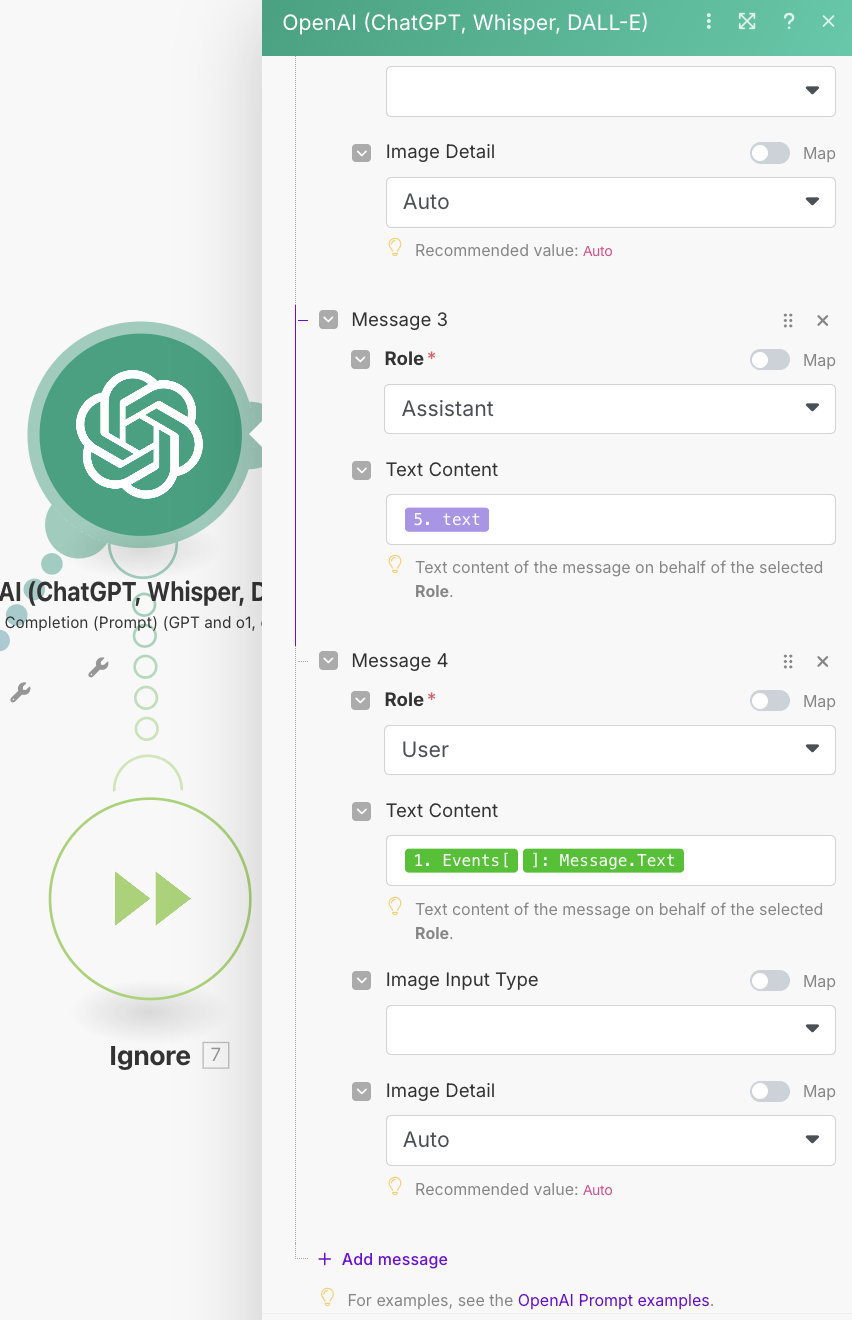
- Message 1: Custom system prompt
- Message 2: User query history (from Data Store)
- Message 3: Chatbot reply history
- Message 4: Latest user query
- Configure
temperature,top_p, and other parameters. - Add an Ignore module to handle errors. Learn more here.
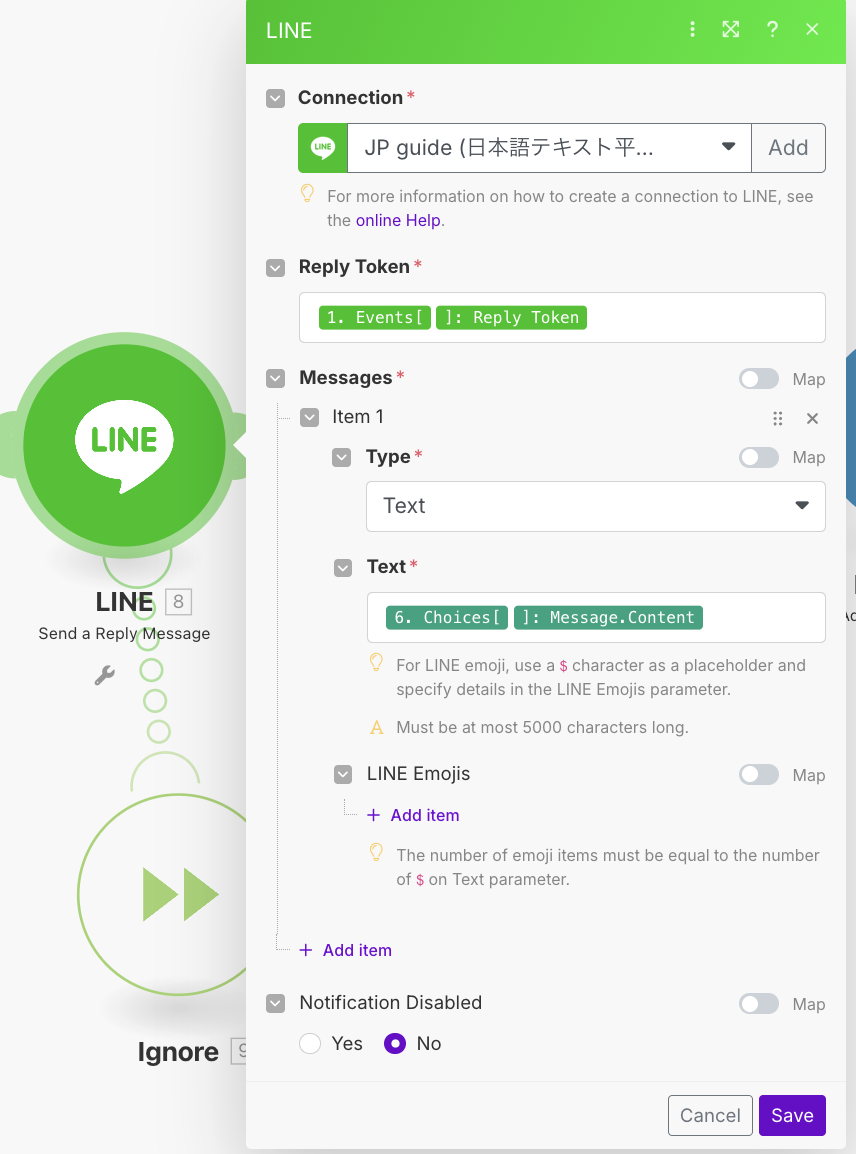
4. LINE → Send Reply + Error Handler
- Send OpenAI’s response back to the user via LINE.
- Use another Ignore module to keep the workflow running in case of delivery issues.
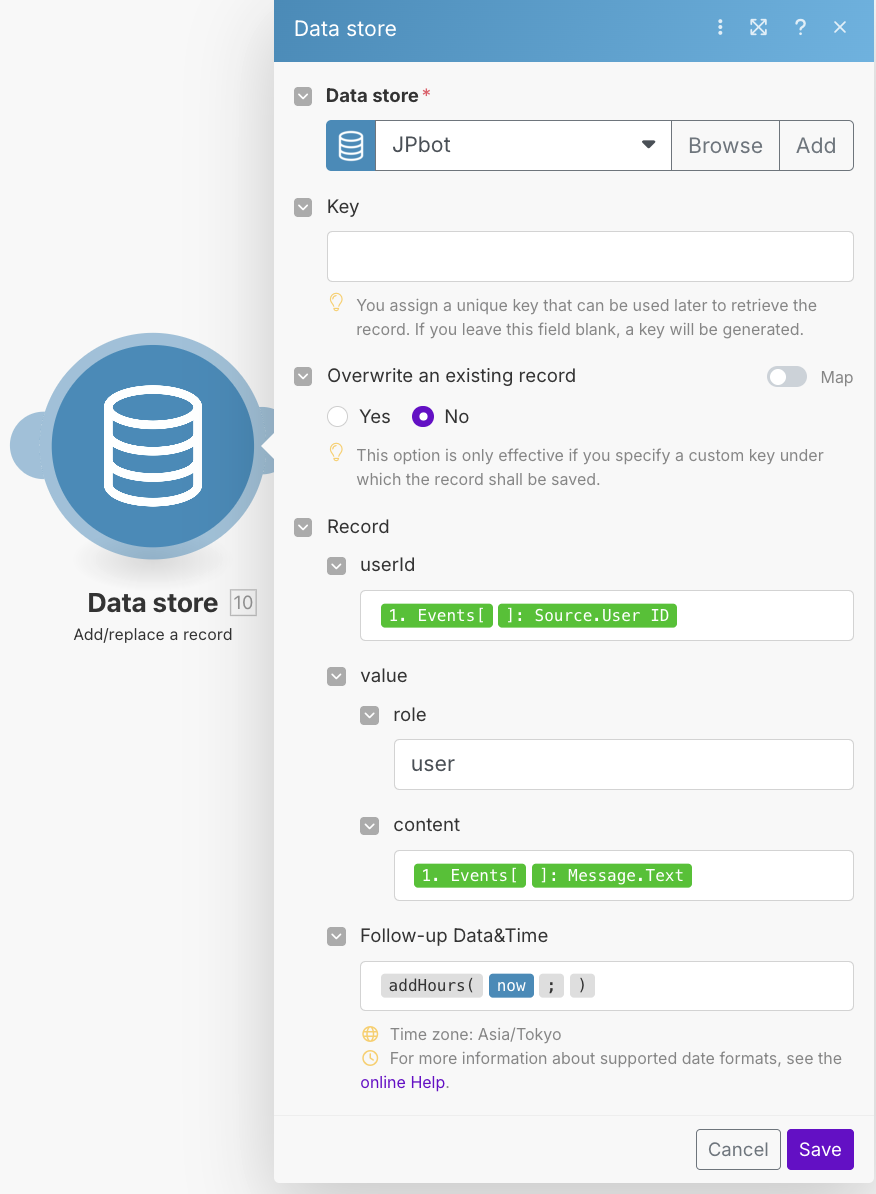
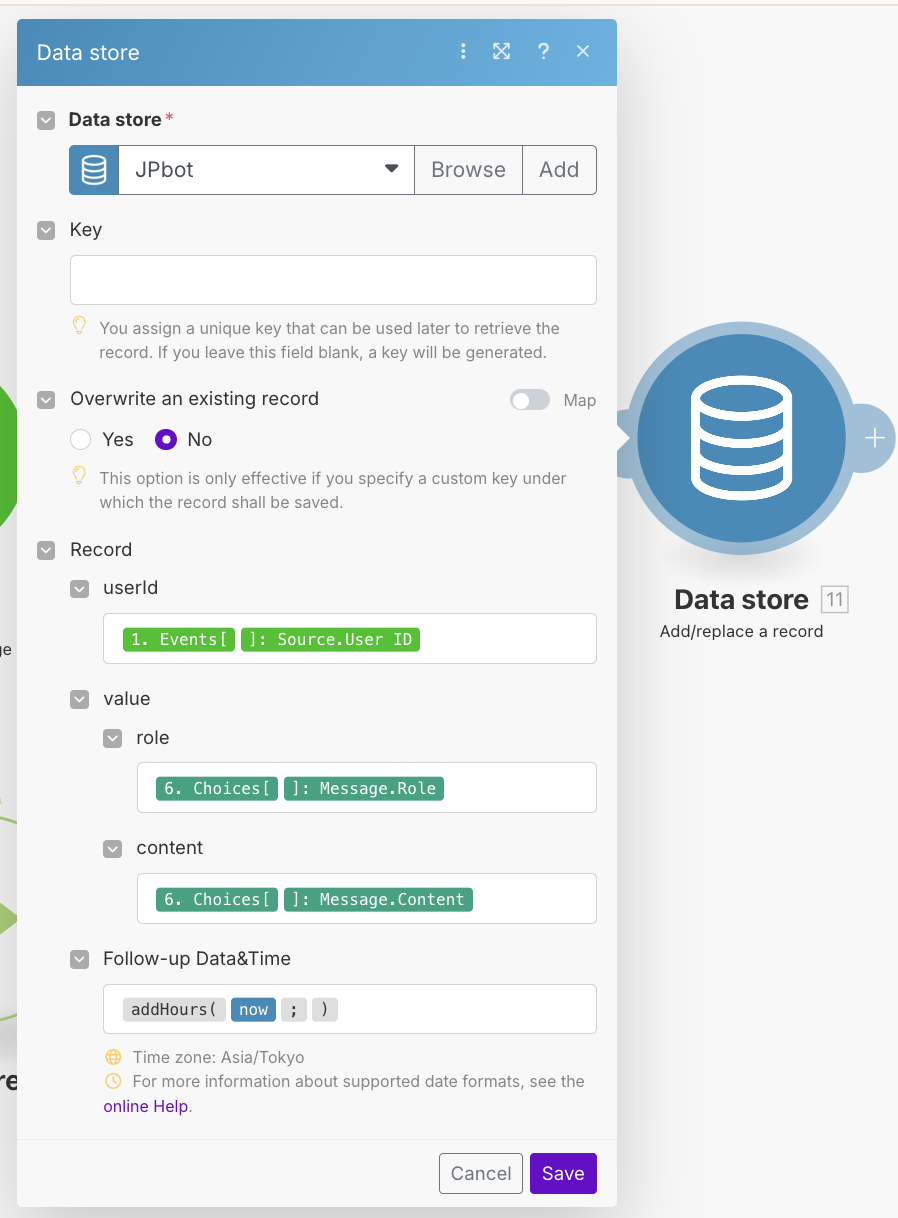
5. Data Store Logging
Learn more about Data Stores here.
- First Data Store: Append the user’s query.
- Second Data Store: Append the chatbot’s reply.
▶️ RUN
After building your scenario, test it by running it once.
- To keep it active continuously, select “Immediately as data arrives”.

You’ll be able to review logged conversations in the Data Store:

Enjoy Reading This Article?
Here are some more articles you might like to read next: